Setting up access for SMTP Auth
- Open the connector you have just created in the connector overview.
- Go to Security and select the following options:
- Authentication:
- Transport Layer Security (TLS)
- Basic authentication
Offer basic authentication only after starting TLS
NOTE: It is not necessary to set up authorisation groups.

- Authentication:
- Click Save.
- Open the Exchange Management Console.
- Execute the following command to assign the appropriate right to the corresponding user:
NOTE: Adapt the connector name as well as the domain and user to your configuration.
Add-ADPermission "ConnectorName" -User Domaene\Benutzer -ExtendedRights ms-Exch-Accept-Headers-Routing,ms-Exch-Bypass-Anti-Spam,ms-Exch-SMTP-Submit,ms-Exch-SMTP-Accept-Any-Sender
EXAMPLE: Add-ADPermission "NoSpamProxy Server" -User EXAMPLE\user -ExtendedRights ms-Exch-Accept-Headers-Routing,ms-Exch-Bypass-Anti-Spam,ms-Exch-SMTP-Submit,ms-Exch-SMTP-Accept-Any-Sender
- To check whether the right has been set correctly, use the following command:
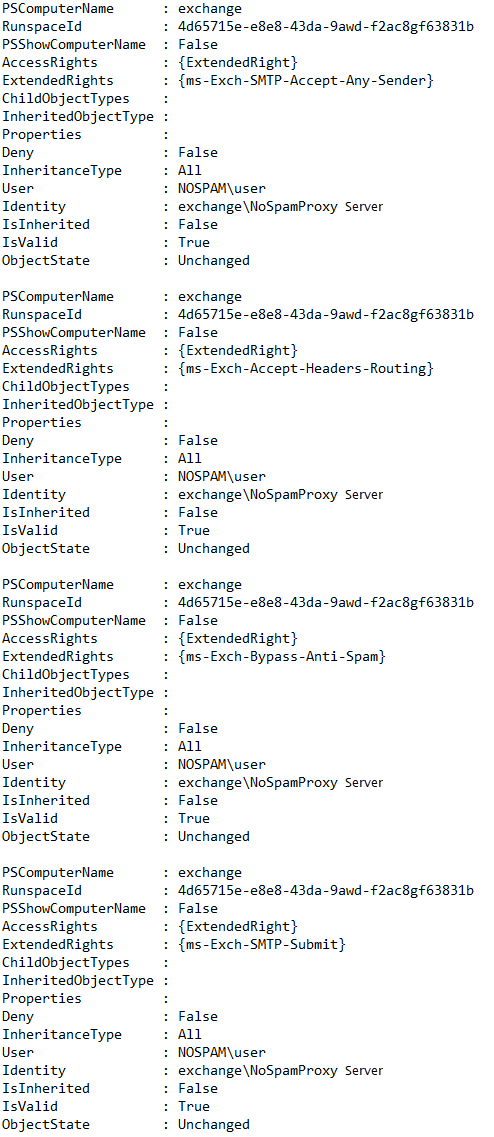
Get-ADPermission "Konnektorname" -User Domain\User | Format-List * -Force
EXAMPLE: Get-ADPermission "NoSpamProxy Server" -User EXAMPLE\user | Format-List * -Force

The output should look like the following picture:
The setup in Microsoft Exchange is now complete. Next, configure NoSpamProxy
-
A TLS-secured connection is required to add servers with SMTP authentication.
-
NoSpamProxy supports the AUTH and LOGIN authentication methods.